Blog
Repairing Carbon
Posts by : carbonsupport | 06/02/2018
We don’t often post up about the background less exciting work we do however, this time around we thought it might be a nice little read.
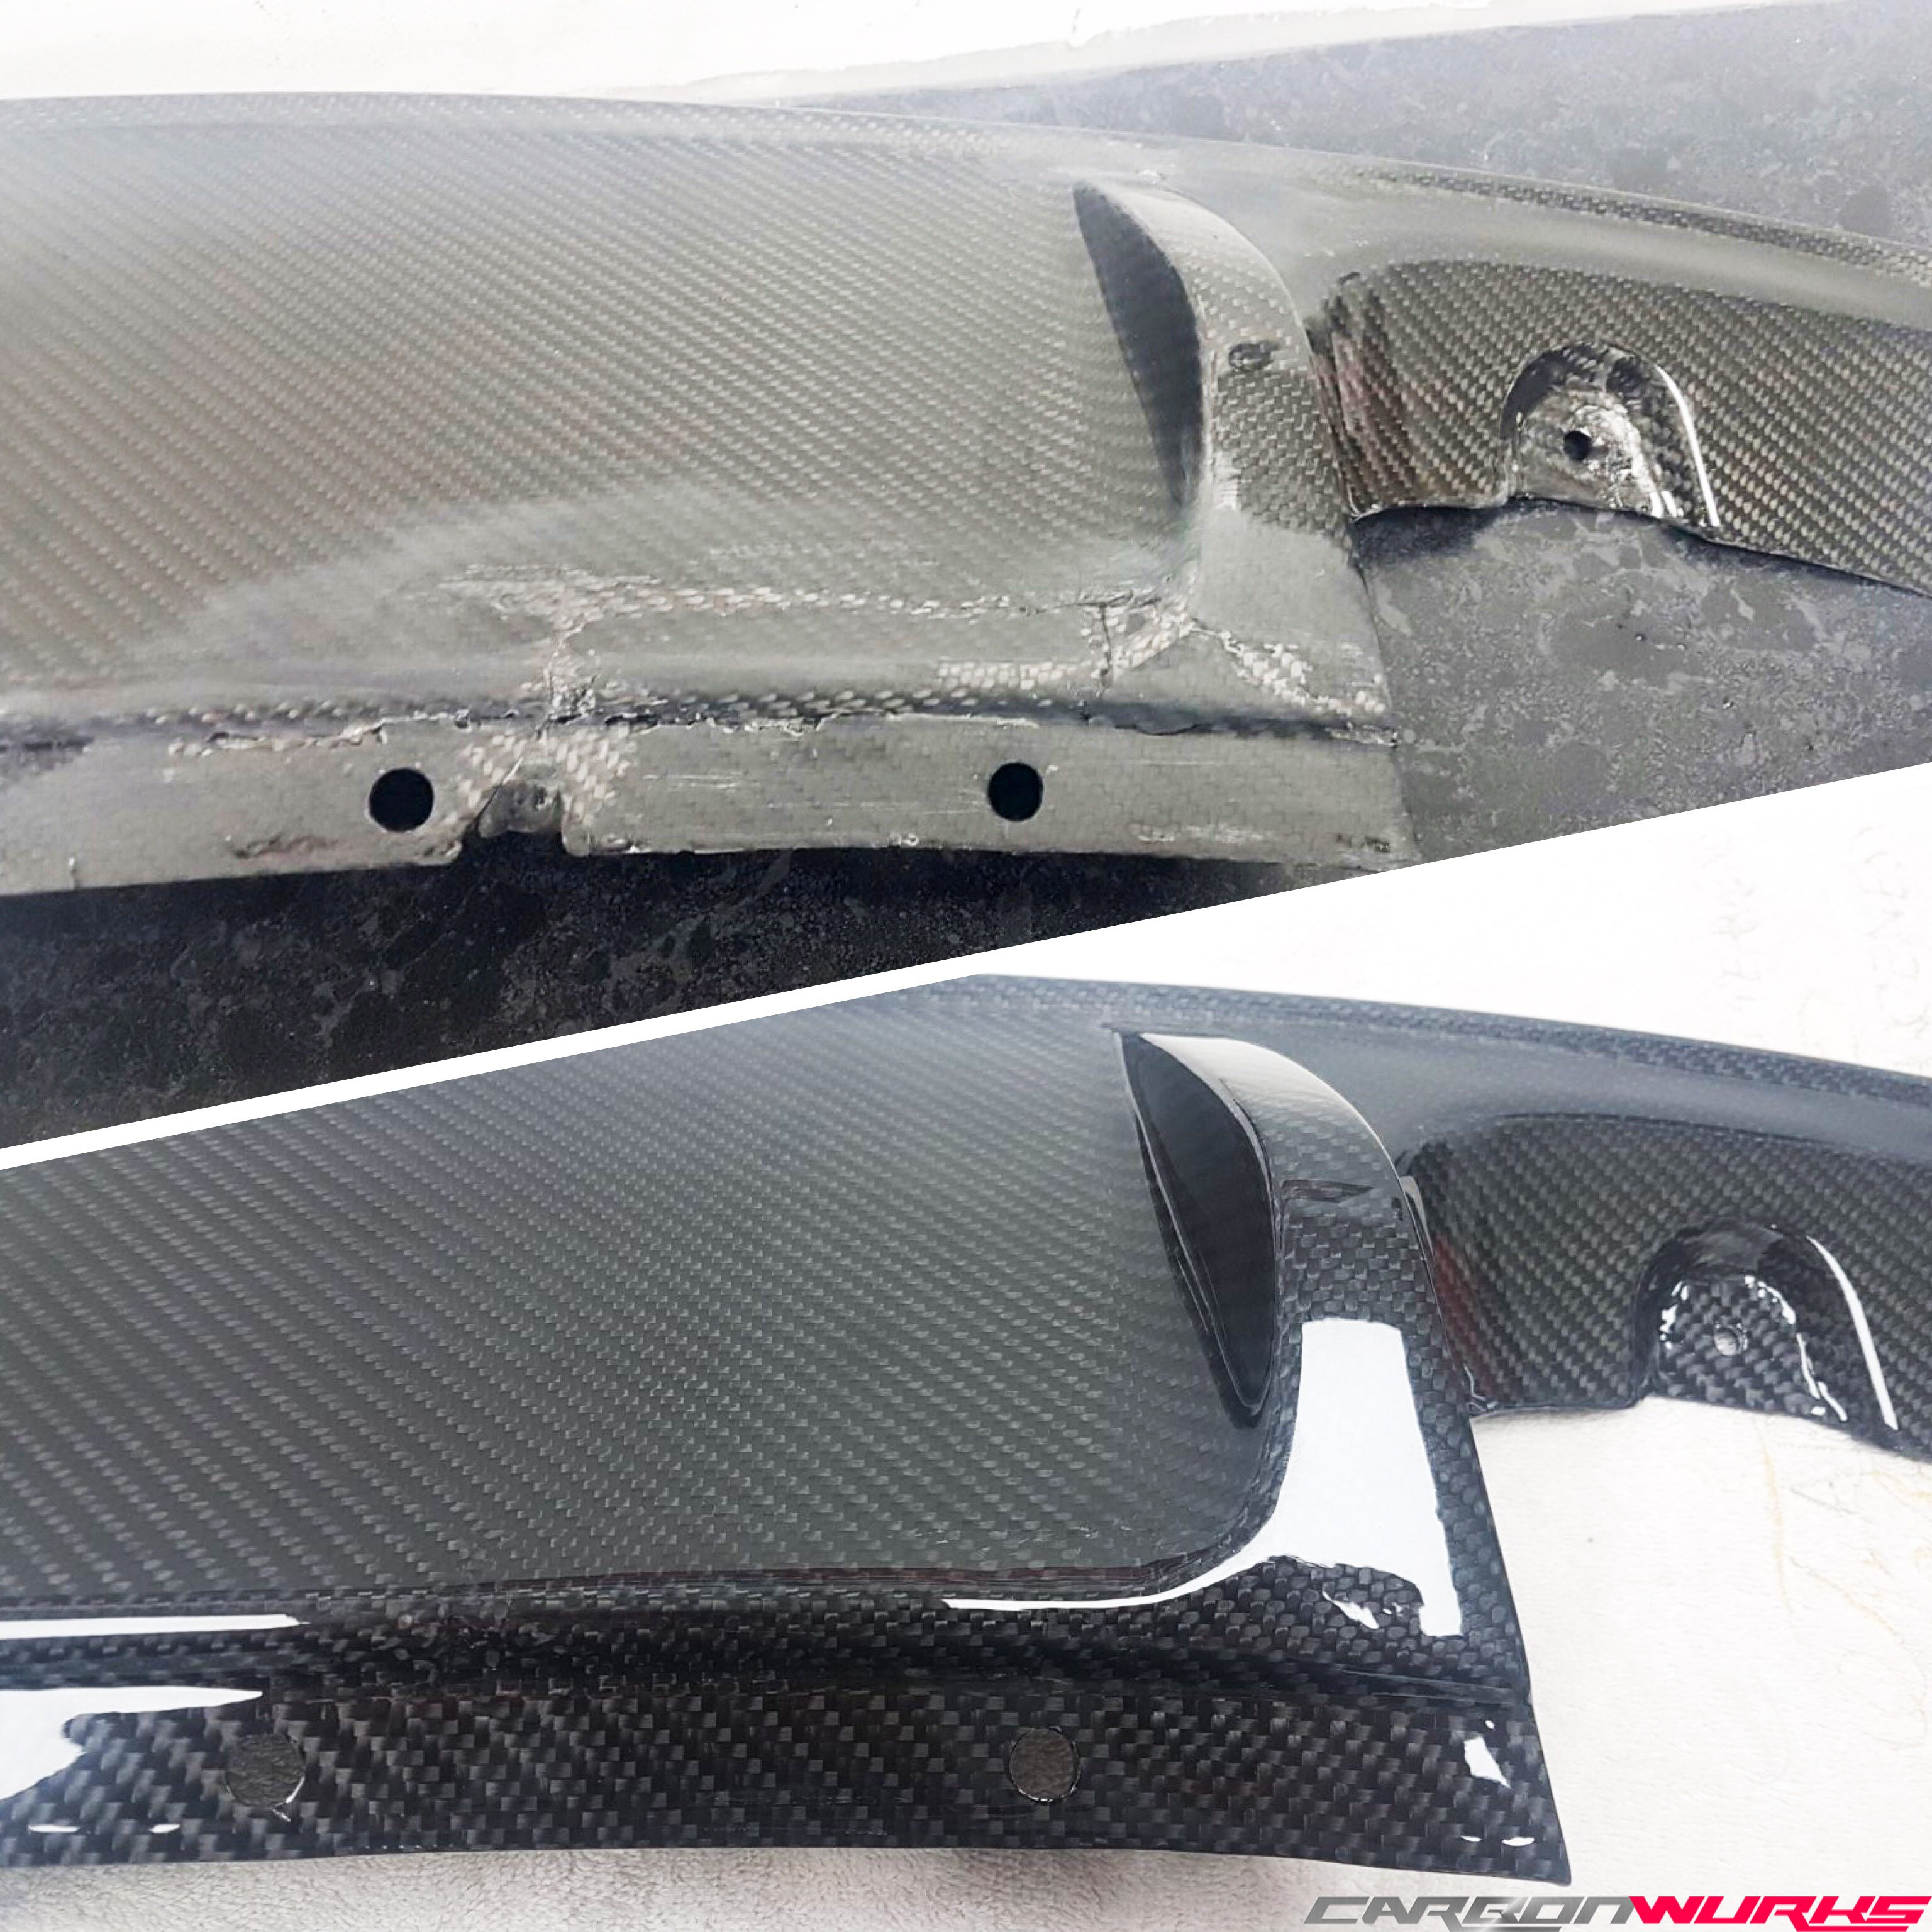
Although we don’t repair a massive amount of carbon it’s something we can offer. Depending on how bad the damage is it sometimes is more expensive to repair than to buy a new replacement part, it also depends on application whether it’s also safe to do so. A Jaguar diffuser came our way recently that is nearly £1,400 to buy new and due to the relatively minor damage it made sense to repair. This repair however was done to the customers budget and being a cosmetic part rather than structural, we opted for a simple wet lay method rather than a vacuum bagging technique.
The diffuser had a fight with a tree stump and unfortunately lost the battle. Part of the lower diffuser had broken along with being deformed. The side bolt positions also had fractured along with the top venturi sections having stress fractures too. This diffuser had also previously been repaired which needed some further refinement.
The first steps were to strip the old cracked resin and lacquer back down to the carbon, probably one of the hardest parts to get right. Go too hard and the carbon comes away, too little and you will always see the cracked and cloudy resin underneath the repair. Once the area has been taken back it’s time to rebuild. The reverse of the diffuser is re-build with a carbon matting and resin mix which is cost effective and yet will give the diffuser a lot more strength.
With the reverse of the part being built up and properly shaped the cosmetic side can start to come together with new twill carbon being laid over. This involves a wetting coat of resin which needs several applications over days with curing time in-between. The side bolt positions are also reinforced at this point with metal spacers being installed and bonded in place before carbon being laid.
With more coats of resin, trimming and flatting in between the carbon starts to form properly. The final part of the repair is completely stripping the old lacquer down, making sure the surface is flat and uniform, the holes at this point are reformed to the original OEM measurements. It’s now time for lacquer.
Once the part has been lacquered the part is then further refined with wet sanding and a course of polishing to bring a super high gloss and smooth finish. Weeks of work involved but bringing an old battered carbon back from the brink is definitely worth it!
Have a look below for the repair process photo gallery.


